Pages

Thursday, December 23, 2010

Chocolate Orange Scones

It has been a long time, but I've finally had the time to post! Writing the entries don't take long but I'm really lazy at editing the photos, hehe. I feel bad that it has taken me this long to put this entry up, since I made these back in September. =X

I never cared much for making bread and quick bread on my own; sure, I love eating them, but they didn't seem exciting enough for me to recreate at home. However, I went to have afternoon tea at the Fairmont Hotel Vancouver last month, and even though I enjoyed all of their savoury and sweet offerings, the only item that really wowed me was their citrus and lemon scones, served with Devonshire cream and berry preserves. There was just something so comforting and homey about those scones. Ever since then, I really wanted to reproduce that feeling which comes from eating something so deliciously simple, so I finally decided to try my hands at making scones.

Unfortunately I don't really remember what the hotel's scones were like exactly, but I did enjoy the hints of citrus in them, so I used what I have: orange zest. The chocolate chunks were added just because I had some leftover, and I know chocolate goes well with orange.

The scones themselves were great, albeit my underbaking them a little (by accident!) due to their thickness. The orange zest was a nice touch, and the chocolate provided a pleasant surprise when you happen to bite into it. I did not have any Devonshire cream, but I did use some strawberry jam with these scones, and the combination turned out really good. I was a bit iffy about the chocolate mixing with the strawberry flavour, but the taste of the jam was more dominant than the chocolate so it wasn't a problem.


Overall this was a good, easy recipe for basic scones. My scone craving is gone for now, but next time I would love to try adding different fruits to this recipe, and maybe get a little closer to the hotel's version.
Chocolate Orange Scones
adapted from Smitten Kitchen

2 cups all-purpose flour
1 tbsp baking powder
3 tbsp sugar
1/2 tsp salt
5 tbsp chilled butter, cut into 1/4 inch cubes
1 tbsp orange zest
1 cup heavy cream
1 cup bittersweet chocolate chunks

Preheat over to 425ºF.

Mix the flour, baking powder, sugar, salt, and orange zest in a bowl. Cut in the the butter pieces using fingertips until the mixture resembles coarse meal with slightly larger butter lumps. (Alternatively, this process can be done in the food processor.)

Add the chocolate chunks and fold into the flour mixture.

Make a well in the centre and stir in the heavy cream with a spatula until a dough begins to form, about 30 seconds.

Transfer the dough into a floured board or the counter top, and knead until it comes together into a rough, sticky ball, about 10 seconds.

Form into a disk, and cut into 8 wedges (or your preferred shape).

Place the dough on an ungreased baking sheet. Bake until the top is light brown in colour, about 12-15 minutes. Cool on a metal rack for 10 minutes.

Saturday, November 27, 2010

Apologies!

I don't know if anybody will even read this, but regardless, please excuse the lack of recent content in this blog. I feel bad for neglecting it since September; I've just been swamped with things to do (mostly school-related) these past few months, and I haven't had time to bake and properly document them since 2 months ago. :( However, there's only one week left until this semester ends, and a few more weeks left until winter break starts, so I will be churning out new content soon!

Monday, September 6, 2010

Tuxedo Truffle Mousse Cake

I can't believe it's already September and summer is over! For the past few weeks I have been working and also enjoying my summer, so that means going out a lot and no baking. Now that the weather is starting to cool down and school is starting, I will be baking a lot more as a way to procrastinate from studying. ;)

First things first, recently fashion blogger Solo Lisa held a giveaway on her blog, and I won! Even though I have a baking blog, I follow mostly beauty/fashion blogs. If I had a better sense of style I probably would have one of those myself, but alas I'm better at baking so that's all you'll be seeing from me. =P Anyway, if fashion blogs is your thing, do check out Lisa's!

Now on to baking! Last year, for his birthday, my boyfriend asked me to make a "tuxedo cake". Having never heard of such a cake before, I turned to Google for help. Most of the results are of cakes shaped like a tuxedo, but I did come across this recipe for "tuxedo cake". Since I didn't know better, that was the cake I made.


Needless to say, it was the wrong kind of tuxedo cake. Last Christmas, I found out that the real tuxedo cake that my boyfriend wanted is the tuxedo truffle mousse cake sold at Save-on-Foods! Had I known this last year, I probably would've bought one to try first and then attempted to recreate it. So to redeem myself, this year I promised that I would make the real version. His birthday was in July so this post is terribly late, but it's better than never.


The cake turned out really good and tasted pretty much like the storebought version. My cake ended up being pretty messy, since I didn't have a rectangular mold to keep everything in the right shape, so I just had to make do with what I have. To be honest though, I would rather shell out the $20 or however much it costs to get one of these in store, because this cake is really time consuming to make. I had to bake the cake in advance (at least 1 day earlier), and it took another day to make the mousses and assemble the whole thing, while creating a lot of mess in between. However, it was a good experience to make something more complicated than usual, and at least now I know that I can recreate a storebought cake.

Tuesday, August 17, 2010

Matcha Tiramisu


I've probably said this before, but in the scorching August heat, it's safe to say that I want to stay as cool as possible and avoid using the oven. (I made an exception for my boyfriend's birthday cake, which will be talked about in the next post.) So when I had a housewarming party to attend a few weeks ago, I chose to make green tea tiramisu, the recipe for which I saw on House of Annie a while back. Before choosing to go with this particular recipe, I considered making either this chocolate bundt cake which has been on my to-bake list for some time, or this strawberry cheesecake tiramisu, which would take advantage of summer berries. But the former would mean having to use the oven, and the latter didn't win simply because I'm loving all sorts of green tea desserts these days. Plus, I simply love the pastel green colour that matcha powder imparts.

Since this recipe requires no baking, all I had to do was make the zabaglione component and assemble the dessert, which is the most time-consuming part of this recipe. I doubled the original recipe to fit an 8.5" round springform pan, and used 2 1/2 packs of ladyfingers. Here's a not-so-funny (for me) story: I decided on this recipe at the last minute and didn't have time to prep until the day of the party, so I spent hours in the morning running around town to search for ladyfingers, because my neighbourhood Safeway only had 1 pack left! That ought to teach me to plan better!


This dessert is definitely not something that's low in fat (just look at the ingredients!) but that means it's a suitable dessert to share at a party, and there was just enough for everybody, which means there was no opportunity to indulge in seconds!
Matcha (Green Tea) Tiramisu
adapted from House of Annie

Biscuit component:
Ladyfinger biscuits (I used 2.5 200-gr packs)
~1.5 cups brewed green tea, cooled

Zabaglione component:
6 egg yolks
scant 1 cup sugar
500 gr mascarpone cheese
3 tsp matcha powder
2 cups heavy cream
1 1/2 tsp vanilla extract

Beat the egg yolks and sugar in a double boiler until it is pale yellow and doubled in volume. Cool the mixture in a cold water bath.

Beat the mascarpone cheese until it is smooth and creamy. Add matcha powder gradually, and mix well after each addition.

Fold the mascarpone mixture into the egg yolk mixture.

Whip the heavy cream, and mix it into the mascarpone mixture.

Assembly:

Line the sides of an 8.5" (or similar) springform pan with ladyfingers.

Dip both sides of ladyfingers in green tea and line the bottom of the springform pan. Do not dip for too long or the ladyfingers will be soggy.

Spread some of the zabaglione mixture on top of the ladyfingers until they are completely covered.

Top with more soaked ladyfingers, and layer on more zabaglione. Do this step 2 more times with the final layer being the zabaglione mixture.

Chill in the fridge for at least 3-5 hours or overnight.

Before serving, dust with matcha powder or icing sugar, or both.

Tuesday, August 3, 2010

Japanese Style Cheesecake


My first encounter with Japanese cheesecake was a few years back through the Miki Ojisan no Mise (ミキおじさんの店) chain that is available in several Asian countries. Japanese cheesecake is probably best described as soft and cottony, and a lot more like cheese-flavoured sponge cake rather being dense and rich. I love all kinds of cheesecakes, but the Japanese one is a little bit more guilt free than your regular New York style cheesecake.

This cake is definitely more time-consuming than regular NY cheesecakes where you just make the crust and dump the ingredients for the filling in a mixing bowl. However, the results are worth it; the cake has a mild cheese flavour and it's light, so you can have more than one (or in my case, most of it!) without feeling too guilty.


Unfortunately this cake didn't turn out perfect on my first try; I neglected to use a springform pan because I thought that the cake would not stick, since I had already painstakingly lined the pan with parchment paper. However, I forgot that I would have to invert the cake, and I did so on a bare plate (as opposed to one lined with parchment paper), so the top golden brown layer stuck to the plate!! It was very devastating, as the top layer was actually very delicious. So my cake ended up being naked and pale, although it was still very good.


So here are my tips: do use a springform pan to save yourself a lot of trouble and tears, and make sure you melt the cream cheese well, as any lumps that remain will sink to the bottom of the cake and get in the way of the desired smooth texture.


Japanese Style Cheesecake

adapted from Diana's Desserts

250 g/9 oz cream cheese
50 g/2 oz butter
100 mL milk
6 large eggs, separated
60 g/2 oz cake flour
20 g/1 oz cornstarch
140 gr/5 oz granulated sugar
1 tbsp lemon juice
1/4 tsp cream of tartar
1/4 tsp salt

Prepare a 8" round baking pan by greasing and lining it with parchment paper.

Preheat the oven to 325ºF.

Melt cream cheese, butter and milk in a double boiler until there are no lumps. Then cool this cream mixture by placing the bowl/pot in another bowl filled with cold water.

In a medium bowl, add cream of tartar to the egg whites. Whisk until the whites are foamy. Add the sugar, and whisk again until the soft peak stage is achieved.

To the cream mixture, mix in egg yolks, salt, and lemon juice. Then gently sift the flour and cornstarch into this mixture.

Add the flour mixture into the egg whites gradually, and mix gently until everything is combined.

Pour the batter into the prepared pan.

Prepare a bain-marie and place the cake pan in it; I used a large pan and filled it with enough water to make the cake pan float.

Bake in the preheated oven for 1 hour and 10 minutes or until the top is golden brown.

Take out the cake pan from the bain marie and cool the cake completely in the pan on a metal rack before serving.


Monday, July 26, 2010

My Favourite Chocolate Chip Cookies

Wow, I didn't realize a whole month has gone by without a new post! I've been kept busy by summer school, and the weather has been very hot lately, so I've been lazy. But now I'm back, sort of!

Over the past year, I've made more cookies than anything else. This is partly because I used to bake often at my boyfriend's residence on campus, and since his kitchen was small and lacking in appliances (an electric mixer, amongst other things), I had to resort to making something simple and effortless.

Most of the time I made variations of chocolate chip cookies because we didn't ever get sick of them, and it was fun to try different textures of cookies. Some turned out utterly delicious, like these crispy salted oatmeal white chocolate cookies and these super awesome peanut butter cookies, but they are not true chocolate chip cookies (or CCC henceforth). In fact, I didn't find any CCC recipes that I really loved during those times I spent baking at my boyfriend's place, even though I tried a bunch.


After a while, the boyfriend moved out, I stopped baking cookies and moved on to more complicated things, the boyfriend moved out, and summer vacation started. Cookies were pretty much forgotten since there were many other more challenging treats that I wanted to bake. Then a few months later, my boyfriend's roommate, who was starting to bake CCC's, was looking for a new recipe to try. I looked around and found this recipe for him. To cut the story short, he made them, I couldn't stop eating them, and the next day, I made my own batch. That's how much I love these cookies! Please do give them a try, and if you love cookies with crispy exterior and chewy interior as much as I do, try the other 2 recipes I linked above, too. I think the crispy+chewy combination is my new favourite texture forin cookies!


Thin and Crispy Chocolate Chip Cookies

recipe from Cookie Madness
yields ~25-30 cookies

4 oz/114 gr cool unsalted butter
1/4 cup sugar
3/4 cup firmly packed brown sugar
1/4 tsp vanilla
1 large egg
1 cup + 2 tbsp all-purpose flour
1/2 tsp baking soda
1/2 tsp salt
1 cup chocolate chips (adjust amount to taste)

Beat the butter until creamy. Beat in both sugars and vanilla. When the mixture is fully combined and creamy, add the egg. After the egg is incorporated, add the baking soda and salt. Stir mixture gently until everything is mixed well.

Add the flour and stir until it is almost all blended in, and then add the chocolate chips. Keep stirring until all the flour is mixed in. Chill the dough for at least 30 minutes.

Preheat the oven to 350ºF, and line a baking sheet with parchment paper.

Roll the dough into small ping pong-sized balls and place them on the baking sheet, leaving a small space in between for the cookies to spread during baking. Bake for about 12 minutes or until the edges are golden brown.

Let the cookies cool on a metal rack, and get a glass of milk ready!

Sunday, June 20, 2010

Eclairs

I must confess, ever since the weather has changed from constant rain to constant sunshine, I've been lazier and unmotivated to bake. And I've also been a little lazy in blogging, even though I've baked quite a few things lately.

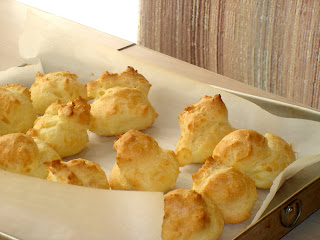
I'd still like to post one of my latest baking adventure: eclairs! I love choux pastry whether they be my mom's homemade ones, Beard Papa's cream puffs, or the frozen mini cream puffs they sell at Costco by the tub. Choux puffs aren't hard to make, but they usually involve piping the dough, and being the lazy baker that I am, most of the time I steer clear of recipes that involve a lot of extra work! But when La Fuji Mama made cream puffs by spooning the dough instead of piping it, I was inspired to follow her footsteps.


The cream puffs turned out excellent; they tasted just like the way my mom makes them. :) Unfortunately the same can't be said for the shapes, but I didn't expect much, since I chose to skip the hassle of piping the dough. Now, for the pastry cream, I had a few different recipes to choose from, but I ended up going with this one. It was okay; I didn't find it sweet enough, and I didn't quite like the texture. I think next time I would go with another recipe for the sake of experimenting.


And eclairs would not be complete without the chocolate glaze on top, right? At this point, I was too lazy to make anything fancier than melting some chocolate chunks (it was a very hot day, and I didn't want to linger in the already warm kitchen for too long), so I did just that, haha. They were still fabulously chocolatey, so that's okay!
Choux Pastry
recipe from La Fuji Mama

1 cup water
1/2 cup butter (1 stick/114 g)
1 cup all-purpose flour
1/4 tsp salt
4 large eggs

Preheat the oven to 400ºF. Prepare the baking sheet by greasing or lining with parchment paper.

Whisk the salt and flour together in a bowl.

In a saucepan, bring the water to a boil over medium-high heat. Then add the butter, and after it has melted, add the flour mixture all at once. Stir vigorously, and cook until it forms a ball that doesn't separate.

Remove from heat and let cool slightly (~1 minute). Add the eggs one at a time, beating until smooth after each addition.

On the prepared baking sheet, pipe or spoon the dough in your desired size with about 2 inches of space in between. Bake until the puffs are golden brown and puffy (anywhere from 20-30 minutes depending on the size). Remove from the oven and cool on a metal rack.

Wednesday, June 9, 2010

Lobsters and Chocolate Pudding


This is neither baking nor something made by me, but recently lobsters have been relatively inexpensive in Vancouver due to the Icelandic volcano resulting in delays in lobster shipment to Europe. So my boyfriend promised that this past weekend we would have lobsters for dinner, and I just wanted to share his creation. It was his first time preparing lobsters (and possibly the last...), and he followed Julia Child's recipe of pan-roasted lobster (video here) with a chervil butter sauce. We couldn't find chervil at the grocery store though, so parsley was used instead, which we don't think worked so well because it made the sauce bitter. But other than that, it was a very lovely meal. :)

For dessert, I made chocolate pudding. I have no pictures (it doesn't look particularly pretty), but the recipe I use has become my go-to recipe for chocolate pudding whenever I need to use up leftover milk. The original recipe is from here but I have tweaked it to my taste.
Easy Chocolate Pudding
adapted from AllRecipes.com

3 heaping tbsp cocoa powder (I use Dutch-processed)
2 tbsp cornstarch
1/2 cup sugar
a pinch of salt
2 3/4 cups milk
2 tbsp margarine or butter
a splash of vanilla extract

In a medium saucepan, sift cocoa powder, cornstarch, sugar and salt. Mix well to prevent lumps from forming later. Add milk.

Stir mixture constantly on medium heat, making sure there are no lumps. The mixture will start to get thicker. When it is thick enough to coat the back of a metal spoon (around the time when the mixture starts to boil), turn off the heat. Add vanilla extract and margarine/butter, and stir to combine.

Optional step: strain the pudding to further remove any lumps.

Let the pudding cool, and chill in the refrigerator or enjoy as is.

Monday, June 7, 2010

Apple Brown Sugar Coffee Cake


Over the long Victoria Day weekend, I went on a trip and stayed at a quaint bed and breakfast. The trip was to explore the city of Victoria, BC, but a big part of me was excited to be staying at a B&B instead of a typical hotel like I'm used to. Obviously I was mostly excited about the gourmet breakfast; I seriously love breakfast foods (eggs, bacon, pastries and other baked goods, yummmm!) and I always abuse the breakfast buffets at hotels whenever I go on vacation. Anyway, at the particular B&B we went to, their specialty was eggs Benedict, and they also serve freshly baked muffins for the guests while they wait for the gourmet breakfast to be cooked. I had expected all of these after reading reviews online prior to my trip, but what caught me off guard was a very delicious apple coffee cake that they served!

I actually never really had coffee cake before, and this one was so simple but delicious. What I liked the most was the apple filling it had. Unfortunately, I neglected to ask for the recipe or even the name of the cake, so I had to scour for recipes myself. I googled "apple coffee cake" and this cake is one of the first few results, so I decided to try it.

This cake is moist and even more delicious after the next day, but I find it a little on the sweet side. Brown sugar is the major ingredient here; it shows up in the cake, the streusel, and the glaze. If I were to make this again, I think I would just skip the glaze, and maybe reduce the streusel proportions, since it yielded quite a lot. (BTW, I know the picture below looks far from appetizing, but it tasted MUCH better than it looked!)


By the way, this turned out very different from the cake I had at the B&B, because after asking around at Bake Bake Bake, I found out that what I was looking for is really the Apple Pie Coffee Cake. D'oh! That's okay, it'll be the next coffee cake I make!

Apple Coffee Cake with Crumble Topping and Brown Sugar Glaze
recipe from Emeril Lagasse
yields 1 9x13-inch cake

Cake ingredients:
1 stick + 2 tsp unsalted butter
1 1/2 cups packed light brown sugar
2 eggs
2 cups all-purpose flour
1 tsp baking soda
1 tsp cinnamon
1/2 tsp salt
1 cup sour cream
1 tsp vanilla extract
2 cups apples (peeled, cored, and chopped)

Streusel ingredients:
1/2 cup packed light brown sugar
1/2 cup all purpose flour
1/2 tsp cinnamon
4 tsp unsalted butter, softened

Glaze ingredients:
1/2 cup packed light brown sugar
1/2 tsp vanilla extract
2 tbsp water

Preheat the oven to 350 degrees F. Lightly grease a 13 by 9-inch glass baking dish with 2 teaspoons of the butter.

In a large bowl, cream together the remaining stick of butter and sugar until light and fluffy. Add the eggs 1 at a time, beating after the addition of each. In a separate bowl or on a piece of parchment, sift together the flour, baking soda, cinnamon, and salt. Add to the wet ingredients, alternating with the sour cream and vanilla. Fold in the apples. Pour into the prepared baking dish, spreading out to the edges.

To make the topping, in a bowl, combine the sugar, flour, cinnamon, and butter, and mix until it resembles coarse crumbs. Sprinkle the topping over the cake and bake until golden brown and set, 35 to 40 minutes. Remove from the oven and let cool on a wire rack for at least 10 minutes.

To make the glaze, in a bowl, combine the sugar, vanilla, and water and mix until smooth. Drizzle the cake with the glaze and let harden slightly. Serve warm.

Monday, May 24, 2010

Golden Lemon Almond Cake


My favourite type of baked goods is definitely cake. If I could survive on cakes alone, I probably would. Recently I had borrowed a copy of Rose's Heavenly Cakes from the public library because Rose Levy Beranbaum is well-known for her cakes, and I wanted to browse through a more modern version of her cake book (versus her Cake Bible, which is a great resource but quite a bit older). Most of the cakes in the publication simply made me want to try them all, but being busy with summer school means I do not have all the time in the world to compose cakes that take a few days to prepare, no matter how delicious they may be. Moreover, these days there have not been any special occasions for which I could bake a cake, so I had to keep it simple.

Having had success with the marble cake which I previously made only increased my love for butter cakes baked in Bundt pans, so I decided to bake something from the "Butter/Oil Cakes" section of the book, and I settled on the Golden Lemon Almond Cake. I chose this cake because I wanted something that is not chocolate (for once), and since I love lemon and almonds, what could go wrong, right?

This cake is very lemony from the double dose of lemon in the batter (I substituted fresh lemon juice for the lemon oil, since the latter seems to be a specialty ingredient and the recipe only needed a very small amount) and the lemon syrup which you brush on while the cake is cooling. The almond flavour of the cake is also quite pronounced, especially since I accidentally burned some of the almond while I was toasting them (whoops!). Overall, this was a very good cake that is a nice change from chocolate. Next time I make this, however, it would have to be for a crowd, because I refuse to finish most of the cake by myself again!

Here's the recipe for this cake, though if you love cakes you should definitely check out Rose's books if you haven't already. I also discovered Heavenly Cake Baker's blog, which is on a mission to bake all of the cakes in Rose's Heavenly Cakes. I love going through the entries to read someone else's firsthand experience baking the lovely cakes in the book, especially some of the more intricate ones!

Sunday, May 16, 2010

Cocoa Brownies

I never really had a high appreciation for cocoa powder, preferring recipes that use "real" chocolate. To me, it just wouldn't feel like the baked good has much substance if the only chocolate flavour comes from cocoa powder. This was the attitude that I displayed when I first encountered this recipe for cocoa brownies on Smitten Kitchen. Well, I did bookmark the recipe, since it does have the superlative "best" attached to its name. However, my snobby attitude got the better of me and I neglected this recipe for a while, only to return to it when I didn't have enough bittersweet chocolate in the house.


May I now say that I was very wrong? I've been converted to love cocoa powder. This recipe yields the darkest, fudgiest brownies that I've ever tried that do not include chocolate chunks. The best part is it is very easy to make with pantry staples, one of which is the star of this recipe, the humble cocoa powder.


I think I even dare to say that this has now become my go-to recipe for brownies. I used almonds because that's what I had at home, but walnuts or pecans would be great, too. I've since made two batches of this, and I'm a bit brownie'd out at the moment, but for sure I will make this again the next time I crave for brownies!
Cocoa Brownies
recipe from Smitten Kitchen
yields 1 8x8-inch pan's worth of brownies

10 tbsp (140 gr) unsalted butter
1 1/4 cup sugar
3/4 cup + 2 tbsp cocoa powder (I used Dutch-processed, but natural will work too)
1/4 tsp salt
1/2 tsp vanilla extract
2 large eggs, cold
1/2 cup all-purpose flour
2/3 cup your choice of nuts

1. Preheat the oven to 325ºF. Line the bottom and sides of an 8x8-inch square pan with parchment paper.

2. Combine butter, sugar, cocoa powder and salt in a heatproof bowl and microwave in 30-second increments until the butter is melted and the mixture is combined. (Alternatively, you can do this step on the stovetop using a double boiler.) It will look gritty, but that's okay for now. Let cool.

3. Stir in the vanilla extract with a wooden spoon. Add the eggs one at a time, stirring vigorously after each addition. When everything is blended and shiny, add the flour and stir until the batter is well-mixed. Then beat vigorously for 40 strokes. Stir in nuts, and transfer the batter to the prepared pan.

4. Bake for about 30-35 minutes, until the brownies are set. Let cool completely on a rack before slicing.

Marbled Nutella Cupcakes

I love Nutella, but we haven't had a jar of the stuff at home for the longest time. This is because we discovered store-brand dark chocolate spread, which is less sweet and has a more intense chocolate flavour. Since then, we kind of forgot all about the hazelnutty goodness of Nutella. Fast forward to a few months ago, when my boyfriend decided to pick up a jar for his dorm room. Having rediscovered how wonderful it is, I would have a slice of bread with some Nutella whenever I visited him. Eventually he donated what's left of his jar to me, and I was able to eat Nutella with bread whenever I wanted. :)

These cupcakes are a request from him, and I happily obliged. I had come across the recipe for it on she bakes & she cooks years ago before I even expressed an interest in baking, and I made a mental note to try, but it never materialized (partly because I never had Nutella around the house).


I did not notice that the recipe calls for no liquid ingredients (other than eggs) until I saw how thick the batter was. This made it a little hard to swirl, but otherwise I had no problems with the batter. Also, unlike regular marble cakes where the chocolate part consists of the batter mixed with chocolate or cocoa powder, in this case, the chocolate part is solely the Nutella dolloped on top of the cake batter and swirled together to create the marbling pattern.

The combination of Nutella and cake is wonderful, as the cake itself is not very sweet, so the nutty chocolate sweetness from the Nutella lends a nice contrast. I'm not sure if I like the cake on its own because it's a tad on the dry side (as well as a little bland), but it definitely works for this recipe since the Nutella is what gives the cupcakes their distinct flavour. The most important thing is that the requester liked them a lot!
Nutella Cupcakes
recipe from Baking Bites
yields about 20 cupcakes

140 gr (10 tbsp) unsalted butter, softened
3/4 cup granulated sugar
3 large eggs, at room temperature
1/2 tsp vanilla extract
1 3/4 cups all-purpose flour
1/4 tsp salt
2 tsp baking powder
Nutella or other brands of chocolate hazelnut spread

1. Preheat oven to 325ºF. Line muffin tins with cupcake liners.

2. Cream the butter and sugar until light, about 2 minutes. Add the eggs one at a time, mixing until the egg is fully incorporated after each addition. Add vanilla extract.

3. Stir in flour, salt, and baking powder until everything is mixed well and no flour remains.

4. Fill the muffin tins with the batter, about 3/4 full. Then add about 1 tsp of Nutella on top of the batter. Swirl the two together to create a marbled design; don't over swirl.

5. Bake for 20 minutes; test for doneness using a toothpick or skewer. Cool completely on a wire rack.

Sunday, May 9, 2010

Buttery Goodness Part 2: Shortbread Hearts


For some strange reason, I had a strong craving for heart-shaped shortbread cookies with jam filling. I remember wanting to make them for last year's Valentine's Day (so long ago!), but nothing materialized because I was busy with school and I ended up making truffles for my boyfriend instead. So this craving came back, and again, I wanted to bake this instead of studying for exams. However, after realizing that I needed to chill the dough for at least an hour, I ended up only making the dough and freezing it for later.

Fast forward ~2 weeks later, I'm finally done with exams and have the chance to bake these cookies. The week prior, I was busy looking for heart-shaped cookie cutters because apparently I had absolutely none at home, not even basic shapes like circles. I searched all over the house and instead I found random equipment I didn't know we had, like a loaf pan, springform pans in different sizes, a cookie press, and not one but TWO muffin tins (this is only ironic to me because I had complained about not having any and I literally went to buy one just hours before I found my mom's hidden collection). Anyway, apparently if you want nice cookie cutters you have to go to well-stocked cookware store, so I trekked all the way there and ended up being too frugal to buy a plastic set for $12. So I ended up getting a set of circular cutters for $7 and my boyfriend insisted on bending them into hearts against my wishes.

Wow, I ended up rambling on the previous paragraph. Anyway, I decided to bake these, lopsided hearts and all. I had trouble with rolling the dough because it was rather crumbly, and they definitely should be rolled out a little thinner. Tastewise, the cookies are exactly what I had been craving for: crumbly and sandy, with a strong butter flavour and just enough sweetness & tartness from the strawberry jam. Unfortunately, I don't have good pictures of the assembled cookies because they all turned out blurry. Fret not, this is not the last time I will be making these cookies!
Shortbread Cookies
adapted from Joy of Baking
yields about 20 cookies

For the dough:
2 cups all-purpose flour
1/4 tsp salt
1 cup unsalted butter, at room temperature
1/2 cup icing sugar
1 tsp vanilla extract

For the filling:
fruit jam or preserve of your choice (I used strawberry)

1. Whisk the flour and salt in a bowl. Set aside.

2. Using a mixer, beat the butter until smooth. Add the sugar and continue beating for about 2 minutes. Add vanilla extract and beat until combined. Stir in the dry ingredients until incorporated.

3. Flatten the dough into a disk shape, wrap in plastic wrap and chill for 1 hour in the fridge.

4. Preheat oven to 350ºF. Line a baking sheet with parchment paper.

5. On a floured surface, roll out the dough until it is 3/4 inch (1 cm) thick. Using a cookie cutter, cut out the dough and place the shapes 1 inch apart on the baking sheet. Chill for 15 minutes to let the cookies firm up.

6. Bake for 20-25 minutes, until cookies are lightly browned on the surface. Cool on a metal rack for about 10 minutes.

7. Sprinkle icing sugar on the cookies.

8. To assemble, spread some jam on a cookie and top with another cookie, or eat as is!

Thursday, May 6, 2010

Buttery Goodness Part 1: Marble-ous Cake


I don't remember how, but months ago I stumbled upon this recipe for a marble butter cake, and I immediately wrote it down on my "to-bake" list. The cake looked so moist and yummy, and there was also something about Bundt cakes that appeal to me. Unfortunately, I didn't own a bundt pan so I didn't get around to making this cake until last week, when I saw that my local Safeway had Nordic Ware pans on sale. I decided to snap it up and make this cake that same weekend, even though I was totally busy with exams. I also underestimated the amount of time this cake needs from start to finish; I "wasted" 2 hours that could have been used to study, but hey, I needed the break.

This recipe yields a lot of batter that even my 12-cup Bundt pan had trouble containing it all. I had to pop this cake back in the oven a few more times after the suggested baking time of 60 minutes. When it was finally done and cooled, I almost had doubts about this cake because nothing about it really stood out, but the next day, this cake's flavour has completely developed and it turned addictive. I loved the buttery flavour, and my favourite part has got to be the lovely brown crust. I really like butter cakes a lot more than oil-based cakes, which is why I didn't really like the yellow cake I made in my previous post. This recipe has tons of butter (I used a little more than the recipe calls for, but only because I had 18 grams extra!) and dairy products (i.e. not figure-friendly), but what the heck, I needed the energy for studying.

For the chocolate batter, I used Valrhona Manjari and did not add any cocoa powder. I was debating whether or not I should, and in the end I decided not to because I wanted to see how strong the chocolate flavour would be. Turns out I really should have added some cocoa; the chocolate flavour was very subtle and cocoa would have been able to add more depth to it. I'm actually on the fence about Valrhona Manjari's flavour; I'd like to try the Guanaja variety next time and compare it to Manjari.


Marble Cake
recipe from House of Annie
yields 1 12-cup Bundt cake

Ingredients
12 oz / 340 gr unsalted butter, softened
6 large eggs
1 1/2 tsp vanilla extract
1/2 tsp salt
1/2 tsp baking powder
1/2 tsp baking soda

3 cups all-purpose flour
1/2 cup plain yogurt
1/2 cup milk
100 gr chopped semi-sweet chocolate
1 tbsp cocoa powder

1. Preheat the oven to 325ºF and grease the Bundt pan.

2. Put chocolate in a dry, clean bowl and melt in microwave oven in 30-second intervals, stirring till you get a smooth paste. Remove and let cool a little.


3. Cream together butter and sugar till mixture is fluffy and sugar has been cut in well.

4. Add eggs, one at a time. Beat on med-high speed for about 20 seconds after each egg, and scrape down before adding the next one.

5. Add the vanilla and mix to combine.


6. Combine the dry ingredients in a bowl. Add them in three portions, alternating with the yogurt and the milk (i.e. 1/3 dry ingredients, yogurt, 1/3 dry ingredients, milk, final third dry ingredient). Stir the batter after each addition, making sure there are traces of flour or yogurt.

7. Take out about half of the vanilla cake batter and drop it around the Bundt pan.

8. To the remaining batter in the mixing bowl, dd the melted chocolate and cocoa powder. Mix well until there are no more white streaks.

9. Drop the chocolate batter between the white batter in the Bundt pan.

10. Swirl the batter together to obtain the marble design. Do not overmix because you will lose the marbling pattern.

11. Bake for about 60-75 minutes. Test the cake for doneness using a skewer (if cake is done, skewer should come out clean). Cool the cake on a cooling rack before slicing.

Monday, April 19, 2010

Take 2 of One-Bowl Vanilla Cupcakes... in Cake Form!

It's final exam season now, and one of my favourite ways to procrastinate is by looking at food blogs, which in turn makes me want to eat. I happened to be looking at Annie's Eats and the delicious treats on her site made me drool inside, so I decided to whip something up. I made some more ganache yesterday to use up leftover heavy cream that was expiring soon, and I wanted to use it as a glaze so I decided to make the one-bowl cupcakes again. Halfway through mixing the batter, I decided I was too lazy to spoon the batter into individual cupcake liners, so I pulled out an 8-inch square pan and poured the batter straight in without greasing or lining with parchment paper (sorry, I was just being way too lazy). Also, this time I used buttermilk as per the original recipe.


(I apologize for the picture quality!)

I was worried that it would result in a different taste than the previous one I made using yogurt, but overall the taste and smell were identical to the cupcake version. However, I don't think this recipe works as well in cake form because it's a lot better in smaller portions, and the cupcake version develops a lovely crust (like muffin tops) which is missing in the cake version. I also found it to be a little greasy, and I think I prefer cakes with butter, which this one lacks. I'll try an actual yellow cake recipe next time, which I imagine would taste better as a large cake (as it should).

Chocolate Macarons

Two weekends ago, I made something I'd been dying to make for a long time - Parisian macarons. (Read about the difference here) Even though macarons have been popular for a long time, I'd never heard about them until sometime last year. I made a mental note to visit some local bakeries that sell these, but I never got to try them until I went on vacation to South Korea last August. They were sold at the food section of high-end department stores, and on one of my trips to these stores I finally decided to try an assortment of flavours.


Doesn't the assortment look pretty and inviting? Unfortunately I didn't like all of the flavours, especially the more unusual fruity ones. However, I recall loving the "safe" flavours like chocolate, coffee, and orange.

Since macarons are too pricey to purchase regularly on a student budget, I decided to make my own. I know that they can be tricky to make, so I made sure to read up on the different techniques, as well as little tips that would make a difference. For my first macaron experience, I decided to choose a flavour I love, which is chocolate. (What else, really?) I found a simple and seemingly foolproof recipe on David Lebovitz's blog. I made sure I read up on lots of macaron-making tips, and I found a great post with helpful step-by-step pictures here. Also, a few months ago, I had put in a request for I Love Macarons at the public library, and the book came to me right on time. With so many resources to turn to, what could go wrong, right?

I wish I could say following instructions carefully will guarantee successful macarons! Let me present you with the pictorial evidence of my creation:


OK, that does not look so bad for a first-timer, right? I was so excited that they had feet! Actually, those macarons above were from my "good" batch, which had a chance to dry properly before I popped them in the oven. The first batch I made looked more like this:


Needless to say, that first batch was not successful, with cracks everywhere and no feet. They looked more like double chocolate cookies than macarons! I analyzed these two batches for the taste, and I noted that the edges were a little too crunchy (too long of a baking time?), but the insides had the right amount of chewiness, and the chocolate flavour was good. The ganache tasted good too, although I should have waited until it was firmer before using it. Obviously my macarons failed in the aesthetics department; I definitely need round tips (I only had star tips which were useless in this case, so I used a plastic piping bag without any tips) and I need to work on my piping skills. And I should probably let my future macarons air dry properly so I can get those pretty little pieds forming. I'm not sure if there was something wrong I did while whipping the egg whites or folding the dry ingredients in, but next time I will definitely be more careful.

Meanwhile, here is the recipe I used. I trust David Lebovitz's recipes; even though my macarons did not look pretty, you can bet that they still tasted great. I can't wait until my next macaron adventure!

Thursday, April 15, 2010

Accidentally Awesome One-Bowl Vanilla Cupcakes

For some reason, I was on a baking roll last week and baked 4 times within 7 days, which never happened before. On Saturday I took a shot at making macarons, and I had leftover ganache, so the next day I decided to make something to use it up. Since I didn't have the greatest success with my macarons (more on that on my next post), I decided to practice my piping using the leftover ganache on some cupcakes. The only easy cupcake recipe I had was Martha Stewart's recipe for one-bowl chocolate cupcakes, but I didn't feel like having more chocolate so I thought I'd do some experimentation and turn them into vanilla ones.

The only kinds of cupcakes I've ever made prior to this have been all chocolatey, so this was new to me. At first I thought it would be as simple as just taking out the cocoa powder out of the recipe, but since the amount was quite crucial to the consistency of the batter, I had to replace it with another dry ingredient, and I chose to use plain old flour. The recipe also calls for buttermilk, but I didn't feel like making some (by adding some vinegar to milk), I used the plain yogurt leftover from making the upside down cake in the previous post. Yogurt works just as well as buttermilk in creating the moist texture of cakes, and I'm glad I used it because the flavour really came through. Since I wanted a strong vanilla flavour, I added more vanilla extract to the batter. I wish I had vanilla beans; I think that would be a nice addition to reinforce the vanilla taste.


As I was mixing the batter, I really wasn't sure how these cupcakes would turn out, although I knew it couldn't be all that bad since I didn't change too many things. Fortunately, what came out of the oven really blew me away! The cupcakes were very moist and had the pleasant smell of yogurt and vanilla, and it was sweeter than I expected even though I used less sugar than what the original recipe calls for. The absence of the overpowering chocolate really let the other ingredients shine.


Since my original intention was to practice piping on these cupcakes, I did just that, and I must say I need to practice a lot more. But regardless of how ugly they may look, they still tasted awesome, and I found the ganache to be a very nice contrast against the plain vanilla flavour of the cupcakes. This mistake is definitely a keeper!


Accidentally Awesome One-Bowl Vanilla Cupcakes
adapted from Martha Stewart
makes about 17 cupcakes

Dry ingredients:
2 cups all-purpose flour
scant 1 1/2 cups sugar
1 1/2 tsp baking soda
3/4 tsp baking powder
3/4 tsp salt

Wet ingredients:
2 large eggs
3/4 cup warm water
3/4 cup plain yogurt
3 tbsp canola (or vegetable) oil
1 1/2 tsp vanilla extract

1. Preheat oven to 350ºF. Line a muffin tin with cupcake liners.

2. Sift together all the dry ingredients in a large bowl. Add all the wet ingredients, and mix until smooth. Make sure to scrape the bottom and sides of the bowl to ensure everything is mixed well.

3. Pour the batter into the muffin tin, filling each liner about 2/3 full. Bake for 20-23 minutes or until a toothpick inserted into the cupcake comes out clean. Let cool completely on a cooling rack.
Chocolate Ganache
recipe from David Lebovitz

1/2 cup heavy cream
2 tsp light corn syrup (I used Lyle's Golden Syrup)
120 gr chopped bittersweet chocolate
1 tbsp butter, cut into pieces

Heat the cream with the corn syrup in a small saucepan. When the edges of the cream start to boil, turn off the heat and add the chopped chocolate. Stir until smooth, and add the butter. Cool before using.

Saturday, April 10, 2010

Banana & Chocolate Chip Upside Down Cake


I LOVE chocolate. I dislike most candies, so ever since I was little, the only sweets I would eat have been mostly chocolate. I also love bananas; I bring them to school every day as part of my lunch. When David Lebovitz blogged about his upside down banana & chocolate cake, I knew I had to try it. I waited until I had bananas that were ripe enough, but I only had 2 in such a condition, so I had to get a bunch more of extra ripe bananas from the store. Luckily I was able to find some amongst a sea of still-green bananas!

This cake was very easy to make, and no mixer was required (my favourite kind of recipes!). I used plain yogurt instead of sour cream because I needed yogurt for another recipe I wanted to try, but I don't think it would have made much of a difference. The result was very moist and full of banana flavour with chocolate chunks studded in every bite. Although my sister complained that there was a little too much chocolate (absurd, I know), my boyfriend & I loved it. It was good on its own but I can imagine it would be even better served with vanilla ice cream, as per David's suggestion.

Banana Chocolate Chip Upside-Down Cake
makes one 8-inch (20 cm) square cake
recipe from David Lebovitz


For the topping:
1/3 cup plus 2 tablespoons packed brown sugar
2 tablespoons water
3-4 ripe medium bananas
a few drops of lemon juice


For the cake:
1 1/2 cups flour
1 teaspoon baking powder
1/2 teaspoon baking soda
1/2 teaspoon salt
1 teaspoon ground cinnamon
3/4 cup granulated sugar
2 tablespoons melted butter
2 eggs
1 cup banana puree (about 2 bananas)
1/2 cup plain yogurt
1/2 teaspoon vanilla extract
1/2 cup (80 g) chopped bittersweet or semisweet chocolate


1. Make the topping: place brown sugar & water in an 8-inch square cake pan. Warm the pan on the stove top over low heat and stir until sugar is thoroughly moistened. Simmer for about 1 minute. Remove from heat and let it cool to room temperature.


2. Peel and slice the bananas in 1 cm slices. Arrange them on top of the melted brown sugar. Sprinkle with a few drops of lemon juice.


3. Preheat the oven to 350ºF.


4. Whisk together the flour, baking powder, baking soda, salt, and cinnamon in a large bowl, making sure there are no lumps. Mix in the granulated sugar.


5. In a separate bowl, mix together the butter, eggs, banana puree, yogurt, and vanilla.


6. Make a well in the center of the dry ingredients and stir in the wet ingredients until almost combined. Do not overmix. Gently fold in the chocolate pieces.


7. Scrape the batter into the pan over the bananas, then use a spatula to carefully spread the batter evenly.


8. Bake for 40 minutes, or until the cake feels just set in the center when you touch it.


9. Cool the cake for about 20 minutes, then run a knife along the edges of the cake to help it release from the pan. Invert the cake onto a serving platter.

Monday, April 5, 2010

Hello!

I'm so excited to finally be able to document my baking experience in the kitchen! However, before I can start posting what I make, I need to find a camera to use to take the photos, since my cellphone camera just won't do. So for now, I'll start off by posting a list of recipes (with their Internet sources) that I have tried since I first started baking "regularly", which was at the end of 2008. I've also indicated the recipes that I like enough to make again in the future in italics. This list is not exhaustive; I have made things in the past using recipes from various cookbooks and other non-Internet sources but I didn't keep track of those, unfortunately. Eventually, I'll create my own recipe index comprised of the entries of this blog.

CAKES AND CUPCAKES
Black-Bottom Cupcakes
Chantal's New York Cheesecake
Dorayaki
Matcha Chocolate Cake
One-Bowl Chocolate Cupcakes
Red Velvet Cake
Red Velvet Cupcakes
Tuxedo Cake
White Chocolate Matcha Cupcakes

COOKIES
Crisp Salted Oatmeal White Chocolate Cookies
Outrageous Chocolate Cookies
One-Bowl Chocolate Chip Cookies
One-Bowl PB & Milk Chocolate Cookies
Peanut Butter Cookies
Perfect Chocolate Chip Cookies (Improved Tollhouse Cookies)
Total Chocolate Chunk Cookies

BREAD & PASTRIES
French Pear Tart
Quick & Easy Cinnamon Bun Bread

DESSERTS
Japanese Coffee Jelly
Tiramisu

SAVOURY
Cabbage, Spinach, Tofu on Noodles with Peanut Sauce
Classic Quiche Lorraine
Macaroni Gratin
Perfect Peanut Sauce
Sausage and Mushroom Crustless Quiche